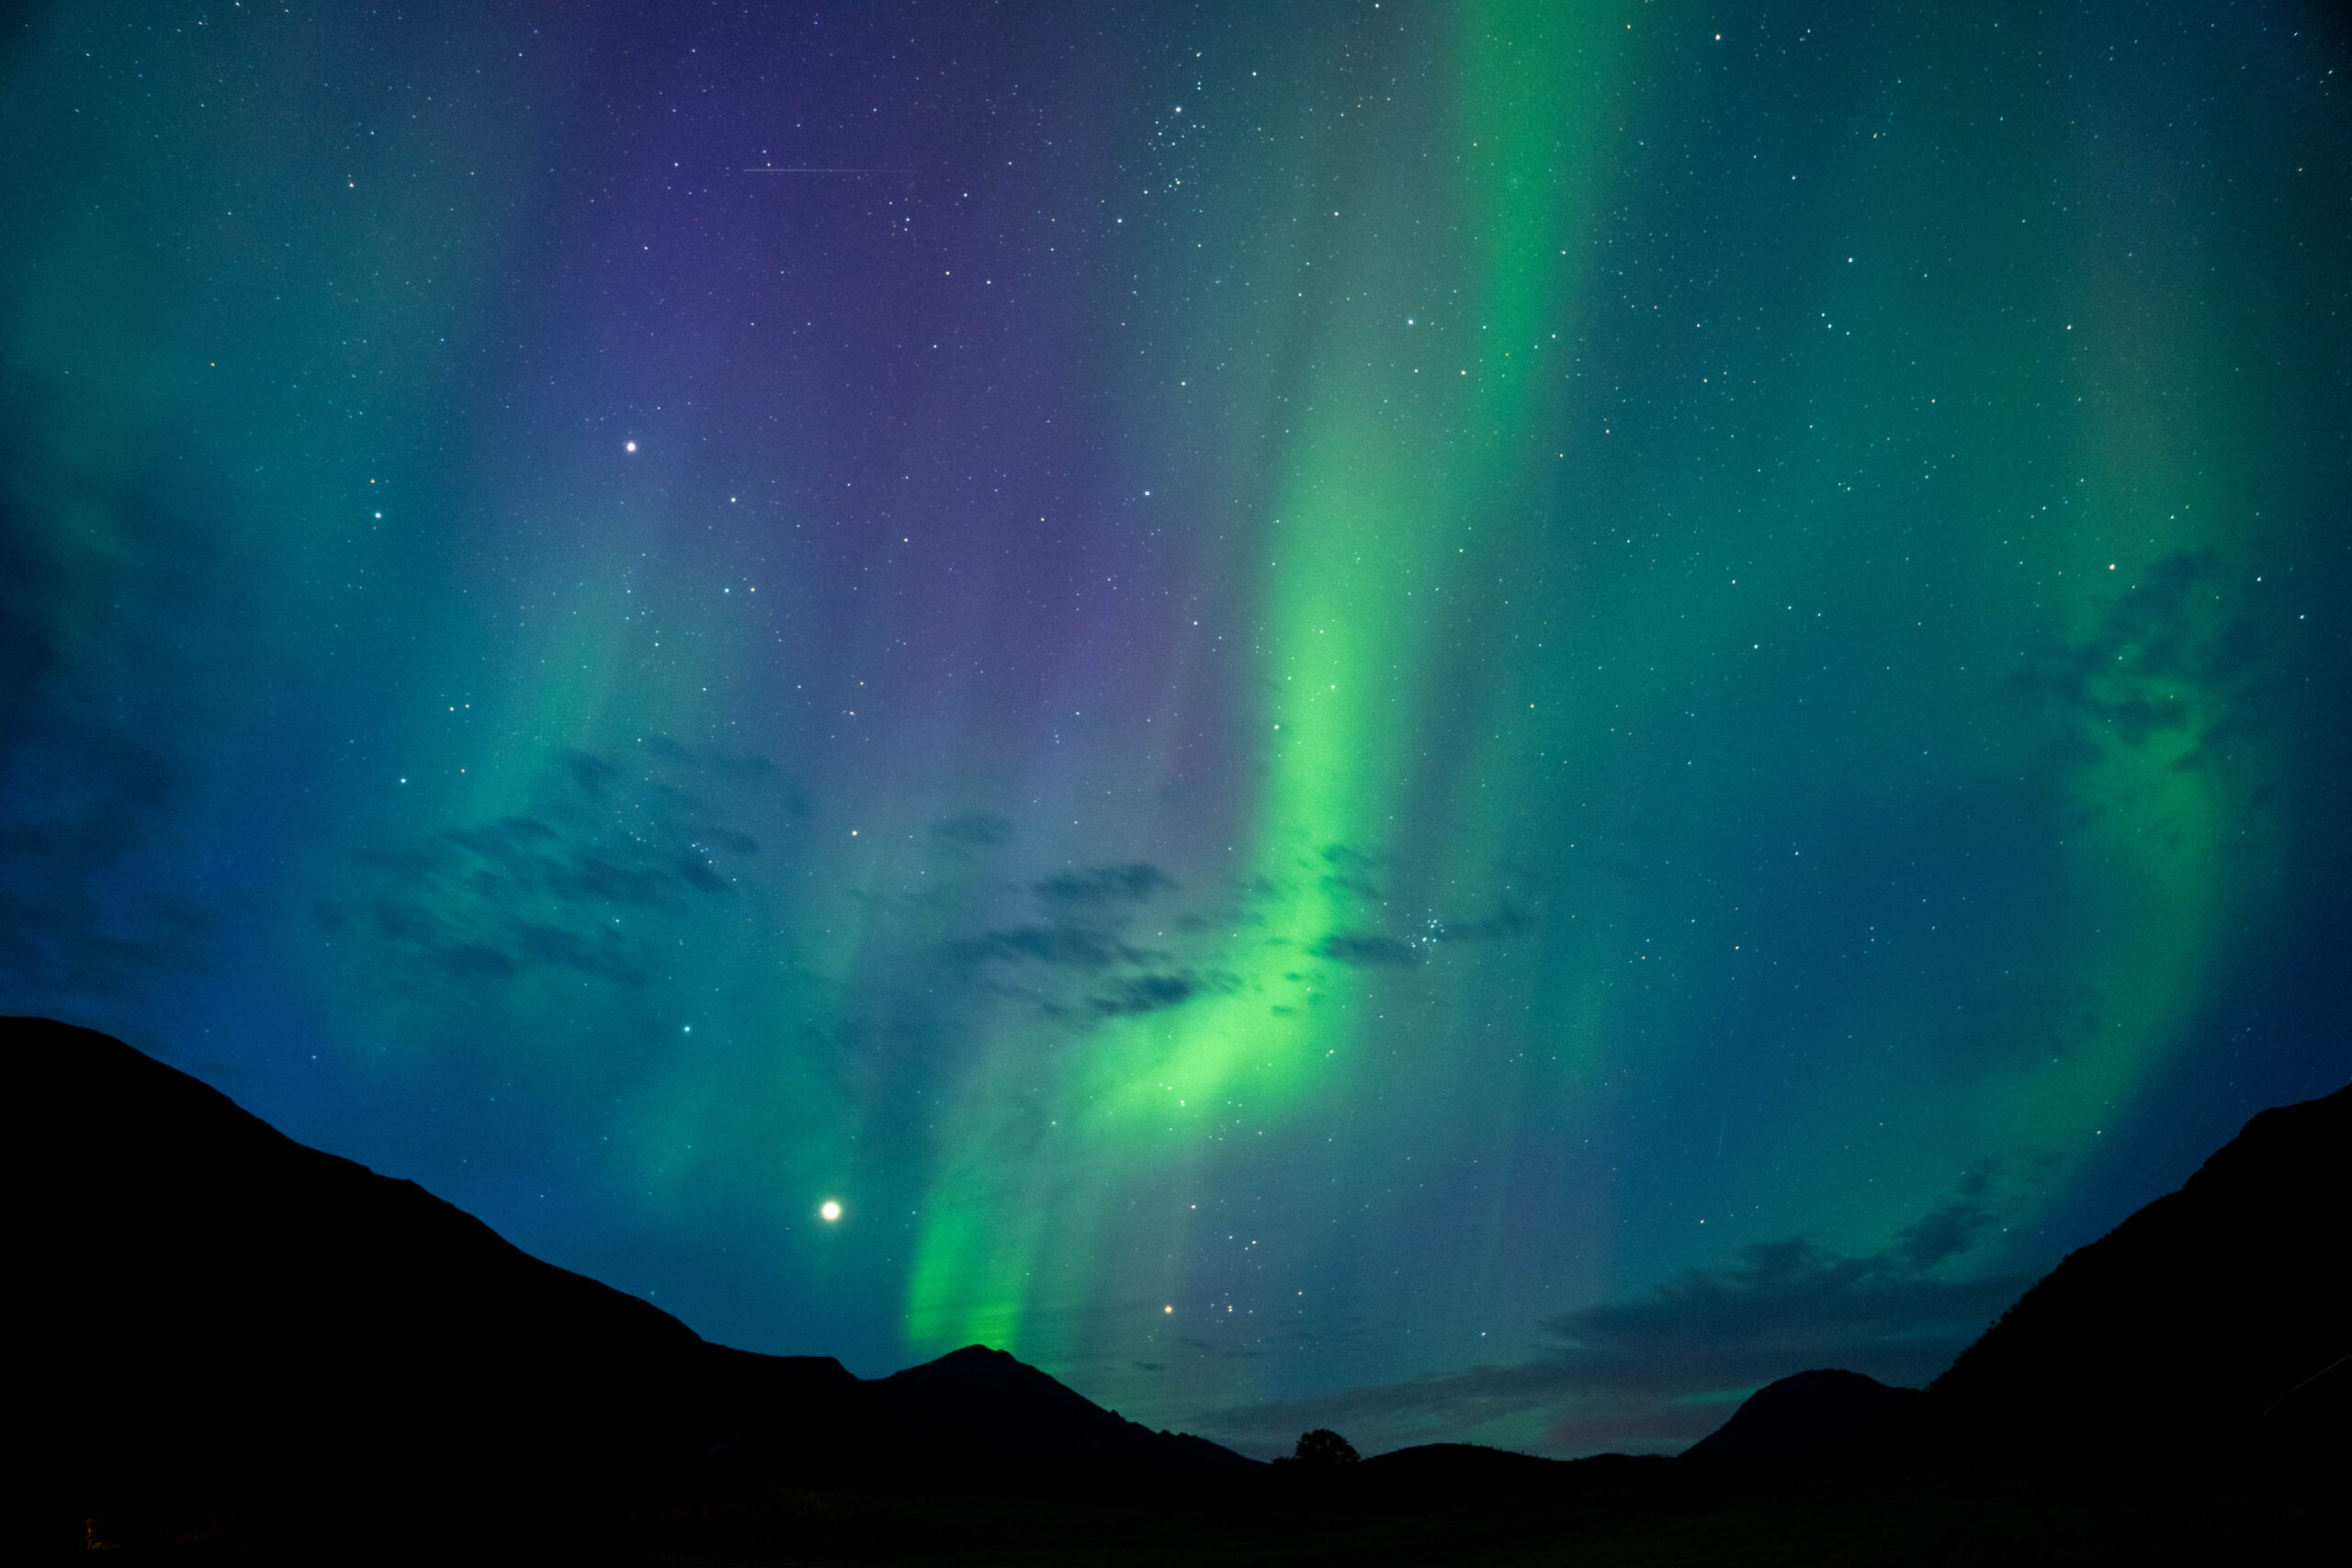
Witnessing the Northern Lights is an unforgettable experience that everyone should try at least once. You’ll definitely want to capture some incredible photos to remember this special moment. But how can you ensure your shots do justice to this natural wonder? In this blog post, we’ll share practical tips to help you photograph this mesmerizing phenomenon with ease.
Know before you go
Planning your trip
Capturing the Northern Lights begins long before you step outside with your camera. Proper planning is key to ensuring you’re in the right place at the right time with the best possible conditions. So, before you excitedly jump on a plane and head out with your camera, be sure to consider the following three things.
1. Choose the Right Time of Year
To increase your chances of capturing the Northern Lights, plan your trip during the months when they are most visible. The ideal time is typically between September and March, when the nights are longest and darkest in the Northern Hemisphere. These months offer the best conditions for spotting the aurora, particularly in areas closer to the Arctic Circle. Additionally, clear skies are crucial for a successful viewing experience, so be sure to check the weather forecast. Heavy cloud cover or bad weather can obscure the lights, making them impossible to see.
2. Tracking the Northern Lights
Maximize your chances of seeing the Northern Lights by using an app like Aurora Alerts. These apps are designed to track aurora activity and provide real-time updates on when and where the lights are most likely to appear. Many of them also include helpful features such as aurora forecasts, location-based alerts, and visibility maps. By staying informed, you can plan your viewing experience more effectively and avoid missing out on this spectacular display.
3. Avoid Light Pollution
To truly appreciate and capture the Northern Lights in all their glory, it’s essential to avoid areas with light pollution. Artificial light from cities and towns can significantly reduce the visibility of the aurora. For the best experience, venture to remote locations with dark, open skies, far from urban centers. National parks, rural areas, and secluded spots near the Arctic Circle are ideal destinations.
Before heading out, use online tools or apps to check light pollution levels in your chosen location. Additionally, keep the moon phase in mind, as a bright full moon can diminish the intensity of the Northern Lights. Opt for nights with a new moon or a crescent moon for optimal viewing conditions.
Everything you need to bring
Essential Gear
To successfully capture the beauty of the Northern Lights, having the right gear is essential. Here are some must-have items to ensure you’re prepared for both the photography and the environment:
1. Use a Tripod
A sturdy tripod is essential for shooting the Northern Lights. Since you’ll be using long exposure settings, any camera shake can ruin your shot. A stable tripod ensures your camera stays perfectly still, resulting in sharp, clear images of the aurora. While traveling, we use the JOBY GorillaPod. This is a small, but very handy tripod that we use to mount our smart-phone, photo- and even our action camera. Because the legs are bendy so you can wrap it around a fence, a tree, anything really. If you don’t care about size and weight, then we recommend a taller standing tripod
2. Choose a Wide-Angle Lens with a Low F-Number
A wide-angle lens in the range of 16-18mm is ideal, as it allows you to capture a broader view of the landscape and the aurora’s sweeping arcs. To capture the faint light of the aurora, opt for a lens with a wide aperture (low f-number, such as f/2.8 or lower). This allows more light to reach your camera sensor, improving your chances of getting bright, vivid shots even in the dark. We use the SIGMA 18-50 mm 2.8 lens and are really happy with it.
3. Dress Warmly
Photographing the Northern Lights often requires long hours outdoors in cold temperatures. Dress in layers and bring warm clothes, including insulated boots, gloves, a hat, and a weatherproof jacket. Staying warm is essential to enjoying the experience and remaining focused on your photography.
4. Bring a Flashlight or Headlamp
If you’re heading to a remote, dark area for better visibility, a flashlight or headlamp is crucial. It helps you navigate safely, set up your gear, and adjust camera settings without fumbling in the dark. A headlamp with a red light mode is especially useful as it preserves your night vision.
5. Don’t Forget an Empty Memory Card
Make sure to bring a high-capacity memory card with plenty of storage. Shooting in RAW format to preserve image quality takes up more space, so it’s better to have extra capacity to avoid running out mid-shoot.
6. Pack Extra Batteries
Cold weather can drain camera batteries much faster than usual. Bring multiple fully charged batteries and keep them warm in your pocket or an insulated case to extend their life. This ensures you won’t miss capturing the moment when the lights appear.
By packing these essentials, you’ll be ready to tackle the unique challenges of photographing the Northern Lights and bring home incredible images to remember the experience.
Frame your Perfect Shot
Composition tips
1. Pay Attention to the Foreground
A great way to create a compelling Northern Lights photograph is to focus on the foreground. While the lights in the sky are stunning, capturing only the sky can leave the image feeling incomplete. Like any strong composition, an engaging foreground adds depth and balance to the shot. Look for something interesting to anchor the scene—a tree, river, person, a building —to make the photo more dynamic. Take time during the day to scout for these elements so you’re ready to frame the perfect shot when the Northern Lights appear.
2. Use Reflections for Added Impact
Reflections can transform a good Northern Lights shot into something truly breathtaking. Calm lakes, ponds, or even puddles can mirror the vibrant lights, adding symmetry and doubling the visual impact. Position yourself at a low angle near the reflective surface to capture both the sky and its reflection for a balanced and captivating composition.
3. Try Shooting Vertically to Capture More of the Action
Don’t hesitate to shoot in vertical orientation when photographing the Northern Lights. The aurora often stretches high across the sky, and shooting vertically allows you to capture more of the dramatic display. This way, you can include both the vibrant lights and the expansive sky, creating a more immersive and awe-inspiring image.
Getting the best photo step by step
Camera Settings
When photographing the Northern Lights, you’ll want to adjust your camera settings to capture the best possible image in low light. Here are some base settings to get you started:
1. Image Format:
Shoot both in RAW and JPG format. RAW files capture more detail and allow greater flexibility when editing, especially in low light conditions. JPG files are already processed by your camera, this provides you with a quick preview of what your image will look like.
2. Focus your lens Manually to Infinity:
Focus your lens manually to infinity. Autofocus can struggle in low light, so it’s best to pre-focus on a distant object during the day or use your camera’s live view mode to fine-tune focus in the dark.
How to do this:
- Switch your lens to manual focus (MF). Autofocus typically struggles in low-light conditions, so it’s best to take control.
- Point your camera towards the sky and look for a bright star (or planet, depending on visibility). The more contrast it has against the dark sky, the better.
- Zoom in on the star using your camera’s zoom feature within Live View. This will allow you to get a closer, more detailed view of the star.
- Using the manual focus ring on your lens, slowly adjust the focus until the star is as sharp and clear as possible. You want to focus so that the star appears as a small point of light with no visible blur.
- Take your time to ensure the star is sharply focused. Even the slightest focus shift can make a noticeable difference in sharpness.
- Is the star sharp? Do not touch the manual focus ring anymore! Once you reframe your shot/zooming-in or out you will need to re-focus..
2. Aperture (f-stop):
Set your aperture as wide as possible, ideally between f/2.8 and f/4. A wide aperture allows more light to hit the sensor, which is crucial for capturing the faint glow of the aurora.
3. Shutter Speed:
For sharper images of the Northern Lights, aim for a shutter speed between 5 and 15 seconds. This depends on the movement of the aurora: if it’s moving quickly, use a faster shutter speed (around 5-10 seconds); for slower-moving lights, you can go a bit longer (up to 15 seconds). Experiment with different speeds to find the best balance.
4. ISO:
Set your ISO to 800-1600. Higher ISOs will make your camera more sensitive to light, but going too high can introduce noise into the image. Start at 1600 and adjust as needed. If you notice too much noise, lower the ISO and increase the exposure time instead.
5. White Balance:
Set your white balance to manual and adjust it to around 3500K. This will help retain the natural colors of the aurora and prevent the lights from looking too warm or too cold.
6. Remote Shutter or Timer
Use a remote shutter release or set the self-timer to avoid camera shake when pressing the shutter button.
Enhance your photos with ease
Post-Processing Tips
1. Adjust Exposure and Contrast
Fine-tune the exposure to ensure the Northern Lights are bright without overexposing the rest of the image. If your aurora is too dim, increase the exposure slightly or use the shadows/highlights adjustment tool to bring out more details.
Enhance contrast to make the colors of the Northern Lights pop against the dark sky. Increasing contrast can add depth to the image and highlight the vibrant greens, reds, and purples of the aurora. Be cautious not to lose details in the highlights or shadows, especially in the sky.
2. Boost the Clarity and Sharpness
Use the clarity or structure slider to enhance fine details, especially in the aurora’s texture. This helps bring out the intricate patterns of the lights. However, be careful not to overdo it, as too much clarity can introduce noise or unwanted halos.
Apply sharpening to the entire image to ensure the aurora and any foreground elements are crisp. If your foreground is out of focus, you can selectively sharpen the sky where the Northern Lights are.
3. Enhance Colors and Remove Noise
Reduce noise in areas with high ISO, especially in darker areas like the sky. Use noise reduction tools to smooth out graininess, but avoid over-smoothing, which can result in a loss of detail in the aurora. Always apply noise reduction selectively if necessary.
Adjust the white balance to make the Northern Lights appear more natural. Sometimes, you may need to cool down or warm up the tones depending on how the lights appeared in the scene. Use HSL (Hue, Saturation, Luminance) adjustments to fine-tune the colors in the aurora and sky.
And lastly… Don’t forget to enjoy the experience
Witnessing the Northern Lights is an unforgettable experience, and it’s easy to get caught up in the excitement of taking photos. Don’t just look at the Northern Lights through your camera screen, enjoy it with your own eyes too!


